What's On This Page
Artichoke usually comes in two varieties, the globe artichoke and the Jerusalem artichoke. The main difference is that the globe has a leafy side. Jerusalem artichoke is the rarer of the two varieties. It grows up to one meter in height. The goal in cultivation is always to harvest before the globe flowers. It is the ball heads that are harvested and cooked. The artichoke plant is not the hardiest. It needs good fertile soil, plenty of water and good cover in the cold winters. But once you get a handle on it, the plant is a real joy.
There are some things you should know about the artichoke plant. They should help you decide when to plant them, harvest them, and how to raise them.
ARTICHOKE GLOBE
How to plant artichoke

Artichoke globe plants have a lot of offshoots coming out around them. This is a great place to get rooted suckers if you need to plant them. This method is great, as you have roots already. The plant would only need to settle into the new soil. A great tip for transplanting rooted suckers is to ensure you get some of the soil with it. That way, the roots are not exposed to a drastic change of condition.
Before planting, dig the soil to air it a little. This should be done around autumn time. This gives you time to get some fertiliser into the soil as well. I prefer using compost.
Dig about 2 inches deep for the rooted suckers.
Allow about 36 inches between plants. This leaves space for suckers to sprout. It also means there are more nutrients to go around.
Planting Calendar
A tip here is to beat the winter blues and use the summer heat. Artichoke thrives in warm conditions. In the UK, we would towards the end of March and April. This is when the winter is coming to an end. Harvest time will be between July and September.
The Soil
The soil must be loamy and breathable (light soil) for the best result. The ideal location to grow your artichoke is a sheltered space with sunshine access. If the soil is too heavy, consider adding some sand to it. It is essential to have good drainage for the plant to thrive.
Caring artichoke plants
As mentioned earlier, artichokes are very delicate plants. They need to be cared for. The first part of this is to ensure the plants are well watered from the moment you plant them. This encourages the roots to spread further. The plants will establish quicker under these conditions. Adding mulch around the stem of the plant goes a long way. You would ideally do this a month or two after planting.
As it gets warmer, keep the soil breathable. This is done by consistently digging around the plant. You can use a fork or a hoe to do this. Keep the plants hydrated by watering consistently.
When you get to late autumn, the stems have had their best days. Cut them and provide cover for the crowns. Use leaves, plants, straw or some shading mesh.
Harvesting
You should have your first mature harvest within a year and a half of planting. Before this, you will see some small heads sprouting up. Cut these off. They are not what you want to harvest.
A season after you have planted, the first harvest will start. The first thing to do is to harvest the king head. This is the largest one on any given plant. You will find it green and unopened. Always leave between 2-3 inches of the stem when you crop.
Do not stop feeding and caring for the plants after the first harvest.
The plant will be productive for about four years after the first cropping. Each mature plant will give you 10-12 heads in that period.
Consumption
Artichoke can be consumed as food or as a supplemental extract.
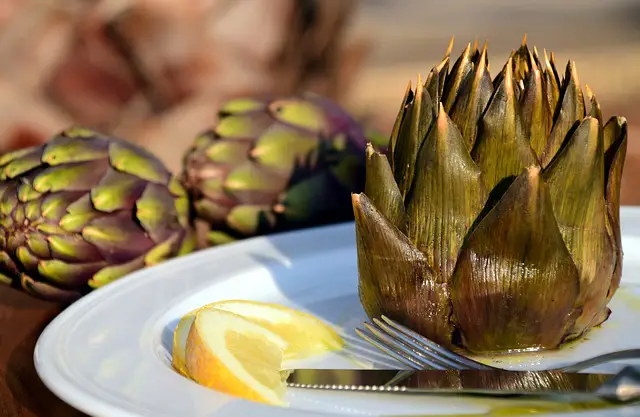
How to cook artichokes
There are various recipes. Here is a simplified way to prepare it:
- Cut the stalk and remove the outer layer with scales
- Wash thoroughly
- Boil in water that is lightly salted, for up to 40 minutes.
- You can eat with a dip
Artichoke leaf extract
Artichoke leaf extract is now sold as a health supplement due to its nutritional benefits, outlined below.
Artichoke benefits for health
Artichoke contains carbohydrates, fibre, protein, fat, Vitamin C, Vitamin K, Vitamin B6, Thiamine, Riboflavin, Niacin, Folate, Iron, Magnesium, Phosphorus, Potassium, Calcium and Zinc. [Source]
Based on these, it may:
-Lower Bad cholesterol
-Blood pressure regulation
-Improved Liver function
-Improved Digestive health
-Eases symptoms of IBS
-Lower blood sugar
Varieties of Artichoke Globe
Camus de Bretagne
- Very large
- Great flavour
- Harder to care for in colder conditions
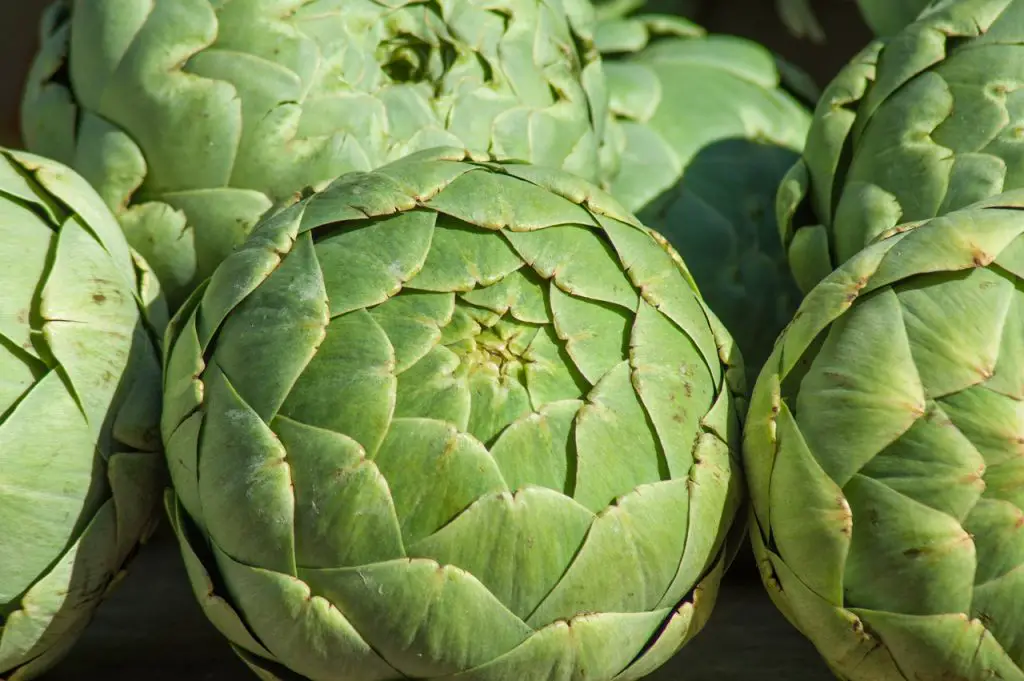
Green Globe
- Large green heads
- Can be found in seeds
- Not packed with flavour
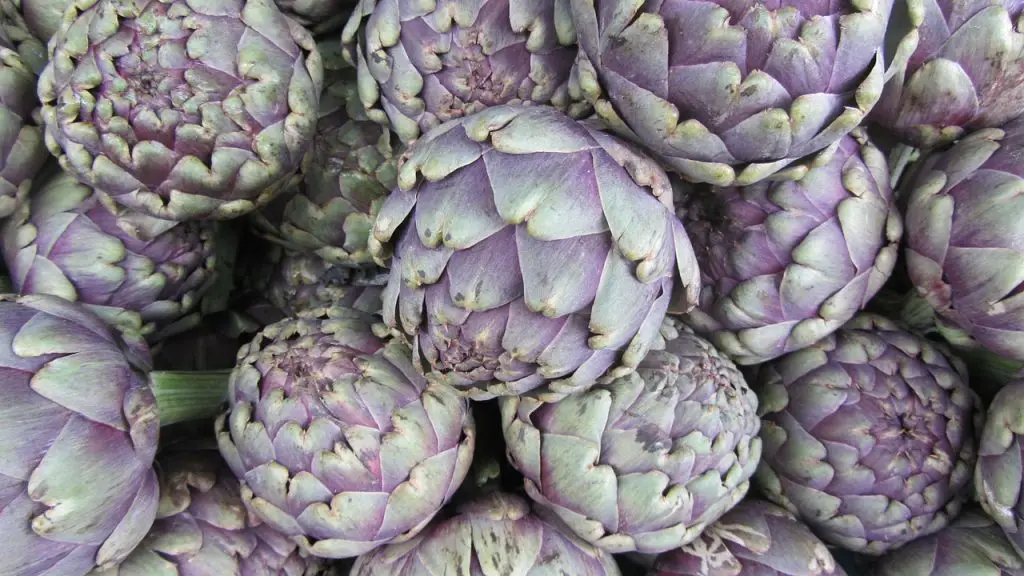
Purple Globe
- Slightly harder than the green globe
- Not packed with flavour
Vert De Laon
- The easiest one to grow.
- Can be found in offshoots as well.
Common Issues with artichoke
Artichokes can be susceptible to several problems and pests that can affect their growth and productivity. Here are some common problems and ways to solve them:
Slugs: During wet weather in the spring, artichoke shoots are often attacked by slugs. To control this problem, you can use slug repellents or slug pellets. Sprinkle these around the base of the plants to create a barrier that keeps slugs from reaching the shoots. In addition, measures such as removing garden debris, practicing good garden hygiene and encouraging natural predators such as frogs and birds can help reduce slug populations.
Late blight: Late blight is a relatively rare but serious problem in artichokes. It manifests itself as brown spots on the heads, which then spread and cover the entire heads, rendering them useless. If you notice late blight, remove the affected parts immediately to prevent further spread. Consider using fungicides approved specifically for artichokes, such as Dithan, if the problem persists. Follow the instructions on the product label for application rates and timing.
Aphids: Aphids can infest the developing flower heads of artichokes. As soon as you notice the appearance of aphids, you must take steps to prevent them from reproducing and causing damage. One option is to spray the infested plants with an appropriate insecticidal soap or pesticide such as Crop Saver, following the product’s application instructions. Encouraging beneficial insects such as ladybugs and lacewings can also help control aphid populations naturally.
Other pests and diseases: Artichokes can also be affected by other pests and diseases such as caterpillars, powdery mildew and root rot. Inspect plants regularly for signs of damage or infestation and take appropriate action to control them. These may include organic or chemical control methods suited to the pest or disease in question, good garden hygiene, and optimal growing conditions to promote plant health and resilience.
ARTICHOKE JERUSALEM
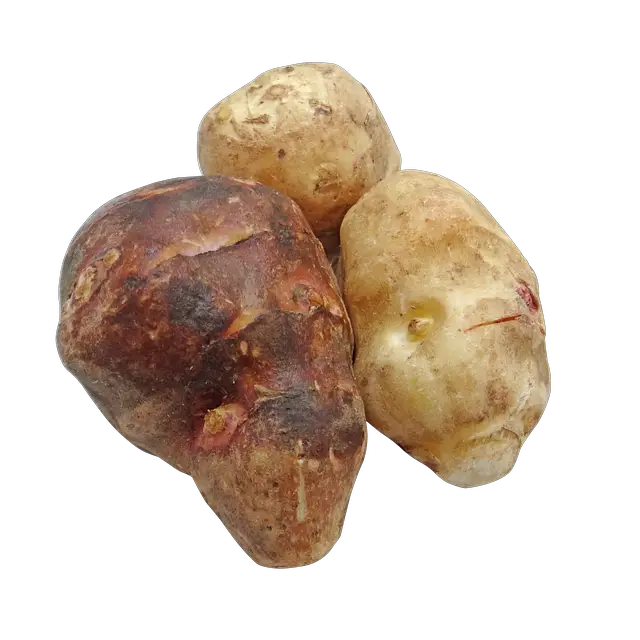
Jerusalem artichoke is a worthy alternative to the potato. But that does not mean they taste the same. You will often find that some people do not like them. I have often heard that the Jerusalem artichoke is an acquired taste. They grow a little over 10 feet tall, an incredible height compared to the artichoke globe. They strongly resemble sunflowers, which is where they got their name.
Key Information
How to plant artichoke
When planting artichokes, there are some important steps to follow to ensure successful establishment and growth. Here are detailed instructions for planting artichokes:
- Selecting artichoke plants: you can start by obtaining artichoke plants, also called crowns, which can be purchased anywhere. Look for healthy crowns with firm roots. You can find these at nurseries, garden centres or farmer’s markets.
- Choosing a planting location: artichokes prefer a sunny location with well-drained soil. Choose a spot in your garden that receives at least 6 hours of direct sunlight daily. Ensure the soil is fertile, loose and enriched with organic material such as compost or well-rotted manure.
- Dig the planting hole: dig a hole about 15 cm deep and wide enough to accommodate the roots of the artichoke crown. Spread the planting holes about 15 cm apart so mature plants have enough space to spread.
- Planting the crown: Place the artichoke crown in the planting hole, ensuring the top of the crown is flush with the soil surface. Gently fill the hole with soil, compacting it lightly around the roots. Avoid burying the crown too deeply, as this can stunt growth.
- Watering and mulching: Water the artichoke thoroughly after planting to firm the soil around the roots. Water regularly, especially during dry periods, moisten the soil without waterlogging. A layer of organic mulch around the plants will help retain soil moisture and suppress weed growth.
- Patience and germination: artichokes need time to germinate, usually up to a month or more. Be patient and provide proper care, including regular watering and adequate sunlight. Once the sprouts emerge, they will develop into mature artichoke plants.
- Maintenance and care: as artichoke plants grow, keep them watered regularly, especially during dry periods. Watch for pests and diseases and take appropriate measures to control them. Fertilize the plants with a balanced fertilizer according to package directions or use organic alternatives. Also, consider picking up taller varieties to protect them from wind or heavy foliage.
When to plant artichoke
The timing for planting artichokes can vary depending on location and climate. Here are some general guidelines for planting artichokes:
UK planting: In the UK, artichokes are usually planted in mid-winter, between January and early April. This timing allows the plants to become established during the cooler months. The harvest of artichokes usually takes place between the beginning of October and the end of February.
U.S. Planting: Planting times for artichokes in the U.S. can vary by region and climate. In general, artichokes are considered cool-season plants and can be planted in early spring or late summer to early fall, depending on the local climate. In cooler regions, planting in early spring allows plants to become established before the heat of summer, while in milder regions, planting in late summer to early fall can take advantage of cooler temperatures and a longer growing season. It is recommended that you determine the best planting times for your location with the help of local horticultural offices or cooperative extension services.
When planting artichokes, it is important to consider the average date of the last frost in your area. Artichokes can tolerate some frost, but planting too early, before the threat of severe frost has passed, can harm the young plants. Selecting appropriate artichoke varieties that are well suited to your climate can also contribute to successful growing.
Remember to adjust planting dates to your specific location and local climate conditions. By following these guidelines and considering regional recommendations, you can optimize the timing of artichoke planting and increase your chances of a successful harvest.
The Soil
Soil quality is critical to successful plant growth. Here are some important considerations for soil preparation:
Drainage: make sure the soil has good drainage to avoid waterlogging, especially during the winter months. Waterlogging can lead to root rot and other problems that can damage or kill the plant. If the soil drains poorly, you can improve it by enriching it with organic matter such as compost or well-rotted manure, which increases soil porosity and water movement.
Soil type: different crops have specific soil preferences. Before planting, it is important to know the soil type required for each crop. Some plants do well in sandy soil, while others prefer clay or loam soils. Conduct a soil test or contact a local agricultural extension office to determine the soil type and make changes, if necessary, to optimize the composition of the soil for the crop you plan to plant.
Prepare the soil: prepare the soil before planting by digging it up in the fall or early spring, depending on your growing season. This will help loosen compacted soil and allow for better root penetration and nutrient uptake. Add organic matter, such as compost, to the soil while digging to increase its fertility and improve its structure. Adding compost helps retain moisture in the soil, improve nutrient availability and promote overall soil health.
pH: Soil pH is another important factor to consider. Different plants have different pH preferences, and maintaining an appropriate pH is critical to plant nutrient availability. Perform a soil pH test using a test kit or send a sample to a soil testing laboratory. Adjust soil pH as necessary by adding lime to raise pH or sulfur to lower pH, following recommendations based on test results and specific plant requirements.
Mulching: Consider applying a layer of organic mulch such as straw, wood French fries or leaves around the plant after planting. Mulch helps retain soil moisture, suppress weed growth and regulate soil temperature. It also gradually decomposes and adds organic matter to the soil over time.
Caring artichoke Jerusalem plants
Caring for Jerusalem artichoke plants involves several important practices to ensure their health and productivity. Here are some key care tips:
- Soil Moisture: Jerusalem artichoke requires consistent soil moisture to thrive. Ensure the soil around the plants is well moisturized, especially during dry periods. Check moisture levels regularly and water plants thoroughly when the top inch of the soil feels dry. Avoid overwatering, as excessively wet soil can lead to rot.
- Tillage: It is beneficial to till the soil around Jerusalem artichoke plants. This will improve water penetration and aeration. However, waiting until the plants are at least 30 cm high is important before digging. This will ensure the roots are well anchored and can handle the disturbance. Use a garden fork or hand tool to gently loosen the soil without damaging the roots.
- Windbreak: wind, especially tall varieties, can damage Jerusalem artichoke plants, especially tall ones. Place a windbreak or wind fence around the plants to protect them. You can do this by using stakes and placing a mesh or fabric barrier on the windward side of the plants. The windbreak will reduce the stress on the plants and prevent them from falling over or breaking.
- Liquid fertilization: Fertilize Jerusalem artichoke plants occasionally with liquid fertilizer to provide additional nutrients. Use a balanced liquid fertilizer or compost tea and apply according to the manufacturer’s instructions or a recommended dilution rate. Fertilize plants during the growing season, especially when producing foliage and tubers.
- Remove flower buds: Jerusalem artichokes produce small yellow flowers in late summer. It is advisable to remove these flower buds as soon as they form. This directs the plant’s energy to tuber production rather than flower development. Cut the flower buds with pruning shears or pinch them off with your fingers.
- Weed control: Regularly remove weeds around Jerusalem artichoke plants, as they can compete for nutrients and water. A layer of organic mulch around the plants, such as straw or wood French fries, can help suppress weeds and conserve soil moisture.

Harvesting
When harvesting artichokes, there are some important steps to ensure a successful harvest and prepare for the next growing season. Here is what you need to know:
- Timing of harvest: artichokes are usually ready for harvest when the buds are large, dense and firm. The ideal time to harvest depends on the variety and desired size but is usually between late spring and early summer. Depending on climate and variety, harvesting can continue until early fall.
- Cut the stem: when the outer leaves of the artichoke plant begin to turn brown and the buds are mature, it’s time to harvest. Using a sharp knife or pruning shears, cut the stem of the artichoke about 30 inches above the ground. This way, you’ll get part of the stem and the bud.
- Removing the tubers: Artichokes form tubers or offshoots at the base of the plant. These tubers can be lifted from the ground and stored for the next season. To harvest the tubers, carefully dig around the base of the plant, loosen the soil and gently lift them out. Be careful not to damage the tubers in the process.
- Provide shelter: Protecting artichoke plants is advisable in regions with severe winter weather. Mulch the base of the plants with straw or a layer of leaves before winter. This will help insulate the plant and protect it from extreme cold.
- Clear the soil: after you have harvested the mature artichokes and removed the tubers, you need to clear the soil of all plant debris. Remove the remaining stems, leaves and other plant parts from the bed. In this way, you can reduce the risk of overwintering pests and diseases in the soil.
- Save tubers for replanting: Select healthy, viable tubers from harvested artichokes to store for the next planting season. Store them in a cool, dry place until you can replant them. Label the varieties and keep track of them to ensure proper identification.
Consumption
Getting back to that potato comparison. There are various ways that you can prepare the artichoke Jerusalem for consumption.

You can:
- Boil
- Fry
- Bake
- Roast
- Stew
You may store it in a sealed plastic bag in a refrigerator. This should keep them fresh for up to two weeks.
Varieties of artichoke
Artichokes come in different varieties, each with its characteristics. Here are some notable artichoke varieties:
- Green Globe: Green Globe is one of the most commonly grown artichoke varieties. It has large, round heads with green scales and tender, flavorful hearts. This variety is known for its versatility in cooking and is often offered in markets.
- Purple of Romagna: This Italian heirloom variety has deep purple heads with a slightly elongated shape. Purple Romagna has a delicate, nutty flavour and is highly prized for its bright colour.
- Globe de Laon: From France, Globe de Laon is an old variety with large, round heads and a prickly appearance. It has a slightly sweet flavour and tender, fleshy leaves.
- Violetta di Chioggia: This Italian variety is characterized by its stunning deep purple colour and round heads. Violetta di Chioggia has a milder, nuttier flavour than other varieties and is often eaten raw in salads.
- Imperial Star: Unlike other artichoke varieties, Imperial Star is grown mainly annually. It is prized for its early maturity, producing small to medium sized heads with a rich flavour. This variety is popular with home gardeners for its ease of cultivation.
- Big Heart: As the name suggests, Big Heart artichokes have large hearts and thick, fleshy scales. This variety is known for its bold flavour and meaty texture, making it a favourite for grilling or stuffing.
- Omaha: Omaha artichokes are known for their tender and sweethearts. They have elongated, conical heads with green scales and are often favoured for their excellent flavour.
- Fiesole: Fiesole is an Italian variety prized for its exceptional tenderness and delicate flavour. It has elongated cylindrical heads and pale green scales.
Common Issues
Slugs
Slugs are a common problem for artichoke plants, and their feeding activity can cause significant damage. Below are some measures you can take to control slugs effectively:
- Watch for slug activity: Check your artichoke plants regularly, especially in the evening or early morning when slugs are most active. Look for signs of slug feeding, such as hollowed leaves or slime trails on foliage.
- Cultural control methods: Cultural control methods can help reduce snail populations. These include:
- Elimination of hiding places: Eliminate garden debris, mulch and fallen leaves where slugs can hide during the day.
- Tidy garden beds: remove rotting plants or overgrown vegetation that can provide hiding places for slugs.
- Use barriers: Enclose the base of artichoke plants with copper tape or diatomaceous earth. These materials create a barrier that is difficult for slugs to overcome.
- Hand-pick: During your inspections, manually remove slugs from the plants and surrounding areas. You can dispose of them by placing them in a bucket of soapy water or removing them from the garden.
- Beer Traps: Set beer traps to attract and drown slugs. Bury a shallow container, such as a yoghurt cup, near the artichoke plants and fill it with beer. Snails will be attracted to the yeast in the beer, fall in, and drown.
- Organic slug control: if you prefer organic methods, slug control products are certified for organic gardening. These include iron phosphate-based slug baits that are safe for pets, wildlife and the environment.
- Companion planting: consider planting slug-resistant companion plants near your artichokes. Some plants, such as thyme, rosemary and sage, are known to deter slugs.
- Monitoring and Care: Monitor your artichoke plants regularly for slug activity and use cultural control methods to prevent future infestations.
It’s important to note that while slug pellets are effective, they should be used judiciously and according to the manufacturer’s instructions. Some slug pellets may contain chemicals that can harm pets, wildlife and beneficial insects. If you use slug pellets, place them strategically around artichoke plants and avoid over-application.
Sclerotinia Rot
Sclerotinia rot, also known as white mould, is a fungal disease that primarily affects the base of plants. It is characterized by fluffy white mould on the affected area. Taking appropriate steps to control the disease is important when controlling sclerotinia rot. Here are some steps you can take:
- Identify and remove diseased plants: Examine your plants carefully for signs of sclerotinia blight. If you find infected plants, remove them from the garden to prevent the spread of the disease. Dig up the entire plant, including the root system, and dispose of it by burning or burying it outside the garden area.
- Improve plant hygiene: To minimize the likelihood of sclerotinia blight reoccurrence, practice good plant hygiene. This includes removing plant debris and fallen leaves from the garden, which can harbour fungal spores and increase the risk of re-infection.
- Adjust watering methods: Avoid overwatering your plants, as excessive moisture can create a favourable environment for fungal growth. Instead, water your plants at the base, directly on the soil, and keep the foliage as dry as possible.
- Apply preventative measures: To protect your plants from sclerotinia blight, you can use preventative fungicides. Consult a local gardening expert or visit a garden centre to find appropriate fungicides for your plants and follow the instructions for their application.
- Use chestnut preparation: chestnut preparation, extracted from chestnut trees, has been suggested as a possible remedy for sclerotinia blight. While there is little scientific evidence of its effectiveness, some gardeners have reported positive results. To use chestnut preparation, dilute it in water according to the manufacturer’s instructions and spray it as a foliar spray on affected plants.
Remember that it is important to monitor your plants regularly for signs of disease and take immediate action if sclerotinia blight is detected. Consult local agricultural extension services or plant pathologists for more specific advice tailored to your region and plant species.
Leave a Reply